General Pipeline
Blender > Modeling > Assign “Lunosi” mat > Assign vertex colors > Refine UV > (Optional) Animate > Export
Modeling
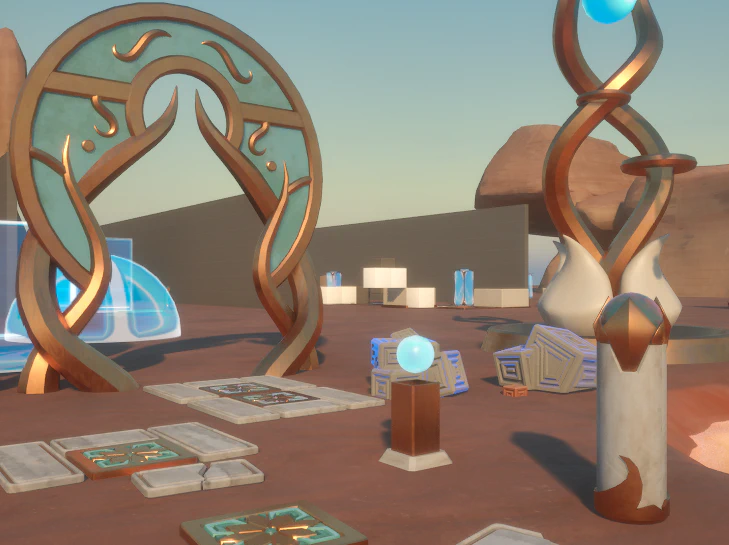
NOTE: Lunosi art is still a work in progress, so we should update this doc as we come up with new keystones! I’ll just list a few of the best practices I’ve seen so far. Lunosi stuff generally stands alone and is not modular. They have large discrete elements that form a kit, but do not perfectly fit together. Bashing is your friend for placement, as well as modeling!
The copper sections in particular have a mix of hard and smooth normals, especially on low poly beveled surfaces. Mess with auto smooth settings or manually assign creases!
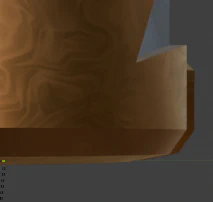
I’ve elected to embrace this seam instead of trying to fix it. Easy!
Material separations generally come with geo separations - Use geo trims when needed.
Material Preview
I’ve set up a preview material in Blender you can use to check UVs and especially normals on the copper.
Setup Library Path:
- Go to Edit > Preferences > File Paths.
- Under Asset Libraries, click the + button then add
\ArtSource\Architecture\Materials\under path - Click Save Preferences.
This adds the Lunosi Materials into the asset browser for all Blender projects (for that version of Blender). The materials were made in v5.0.1, but should work in any recent version? Untested.
Any future updates should automatically backport to projects if we make changes.
You’ll need to set the viewport to use the Material Preview mode, IE the third checked looking circle in the top right.
![]()
It may show us as just a blue blob - that is because you’ll need to set up vertex colors:
Vertex Colors
The three materials are separated via vertex color.
| Color | Material |
|---|---|
| Red | Copper |
| Green | Stone |
| Blue | Glow / Teal Stone |
| Alpha | Hover effect (check VAT Section) |
- In edit mode, select the faces you want to paint.
- Switch to Vertex Paint mode. Make sure the face selection button is checked!
- Using the leftmost color display set it to the desired color, EG for copper R1 G0 B0
- Press
Ctrl + xto fill the selection - Repeat for the other colors as needed!
You can actually modulate the brightness of materials by setting their color value between 0.2 and 0.9. Any values above 0.5 will be brighter (up to double), and any below will be darker. Values at 1 remain untouched (base value) and values must be above 0.2 to be considered masked (part of that material)
This gradient is how vertex color intensity affects brightness - notice the notch at the top clamping the value back to ’normal'![]()
Different values darken and brighten the glow parts.
You can also use “Enhanced Vertex Color Tool” (Tarmunds Addon) to set the whole object’s vertex color - useful if you’ve modeled your mesh as separate objects.
If you have set the material preview, you should immediately see the results on your mesh!
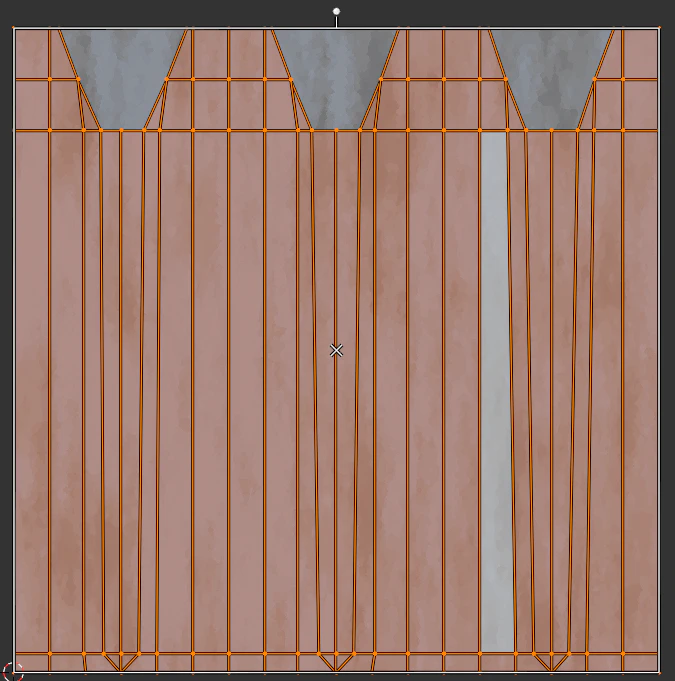
UV
All three “material” types need UVs to look their best. These can (and probably should!) be overlapping.
For stone, skewing the UV can be a nice way to break up columns without seams.
First, wrap your cylinder. You can check Constrain to Image Bounds and transform to stretch it perfectly to the seam.
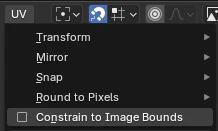
Constrain to Image Bounds, and with everything selected, hit hift + Ctrl + Alt + S to skew the UV.
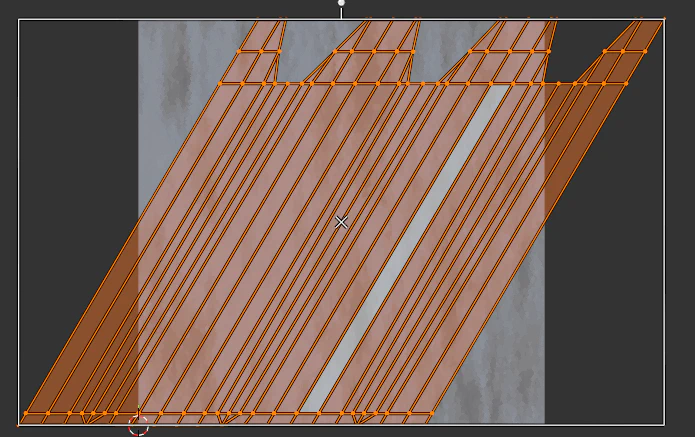
Copper is generally more forgiving as it doesn’t have as recognizable of a pattern, but try to get the scale relatively consistent. There arn’t any hard texel density rule but use your best judgement.
If you use a solidify modifier remember the UVS will be stretched - not the worst look depending on the situation!
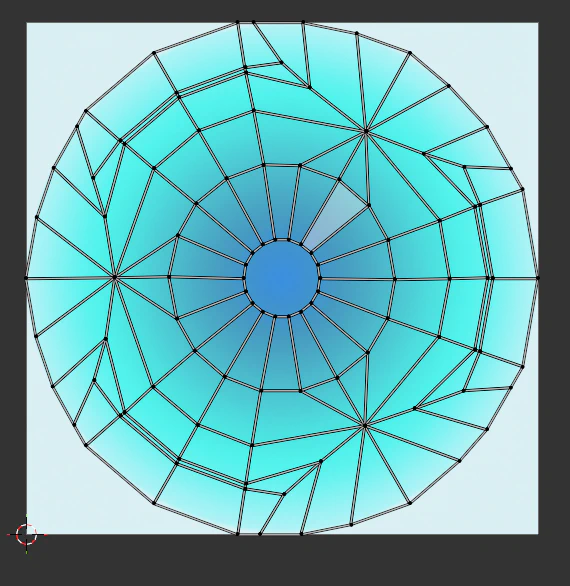
The “Glow” material is based on a circular gradient. The effect (in game) pans outwards from the center of the gradient (UV 0.5,0.5) outwards. The preview material displays a simple circular gradient in which you line up your effect. In general, if the gradient looks good in Blender it should look good in UE.
Animate
Lunosi objects support the full VAT workflow that plants use - take a look at the doc for instructions.
There are a few things to consider - VAT does NOT respect hard / split normals and will render everything as smooth. There are a few ways around this:
- You can use very sharp bevels or simply double your geo on edges and split (this is what happens under the hood for split normals anyways!). This is fine for small stuff, but keep in mind the 4k vert count limit on VAT.
- You can just not use VAT normals, IE only update offsets. The material in UE has an option for this. This will preserve the base mesh normals but of course won’t update with animations - stuff that just translates and never rotates, or barely rotates are good candidates here. Easy to give it a try.
- Use a tangent space normal map to bake the hard normals / bake from high poly. Obviously the most labor intensive approach, and currently the material doesn’t support this workflow but would be very easy to implement. We’ll see if we end up wanting to do zBrush stuff.
- Don’t use VAT and instead use full skeletal animation / morph targets. This is appropriate for larger more complex objects.
Currently VATs have limited animation support that will be added to as needed moving forward. BP_LunosiLightPost is an example of the workflow I’m thinking of using for Lunosi things.
While theoretically possible I don’t think having “stages” of animation through VAT is practical, in the sense that while transitioning from start to loop then looping is possible, doing it in reverse is not due to the lack of blending (I could theoretically run two vats then blend but now we are getting too complicated). That might be a fine approach if we never need to reverse, so I might add that feature in the future (also adding it to plants!)
Hover Anim
To help mitigate this restriction I added an optional procedural “Hover” effect that can be used standalone or in conjunction with VATs. This effect is a simple sine wave “hover” that moves up or down, with amplitude and frequency controls in the material instance.
Paint the sections you want to hover with alpha. Any values over 0.1 are considered hovering and will animate. You can offset the hover by assigning random values between .15 and 1 to make individual pieces look a bit more natural.
NOTE: Blender doesn’t really like the alpha channel of vertex colors. As far as I know you can’t actually paint alpha directly with the vertex paint mode. However, you can use “Enhanced Vertex Color Tool” (Tarmunds Addon) and set use
Fill Alpha Channelto set an entire element’s alpha, which should work for separated assets. Alternatively, you can paint them in Unreal’s modeling mode, which has a decent flood fill option.
Export
The standard export FBX method works just fine here - just make sure Unreal’s importer is importing vertex colors and not mangling normals. If using VAT, be sure to follow that export process instead.
Asset in Blender
Unreal
I could automate some of this, but I have a feeling having a bit of manual control in this step is fine. Lemmie know if this is a pain point!
Import your asset, then create a new (or copy) material instance. Set the parent to /Game/Lunos/MaterialLibrary/Lunosi/M_Lunosi
- You can enable VAT and Hover stuff here. The alphas for these effects can be driven by custom primitive data in blueprints.
- “LunosiGlow” can be converted to
bGlassfor a glossier look, intended for glowey orb guys.
You can also set 
bYseFresnelBasedGradient to have it have the sine wave glowey pattern be based on fresnel gradient IE rim. Looks good on spheres.
The end result!