Using VSCode - Experts Only!
Alright, you are a cool hacker elite and want to edit the site the advanced way? You can clone the whole repo and use Visual Studio Code to manage source control and make edits.
Honestly, it is a bit much if all you wanna do is edit a page now and again, but if you are doing heavy editing this is the way to go. Take a look at the comparison:
| GitHub Editor | VSCode |
|---|---|
| Basic Editor | Full IDE |
| Commit files one by one | Commit all when ready |
| Slow image upload process | Copy paste images directly |
| Inaccurate slow previews | Automatic accurate preview |
| Browser based | Must install software (free) |
| Easy authentication | One time auth setup |
“Quick” Setup
- Make sure you have a GitHub account / linked to our private repo
- Download and install VSCode (what you’ll write in)
- Download Hugo (used for previewing the site!)
- Scroll down and click on your os (prob
hugo_extended_versionnumber_windows-amd64.zip) - Extract the contents of the zip somewhere - I made a lil folder next to where I want to store the website files themselves.
- Annoyingly, you’ll have to manually set the “PATH” environment variable so VS can talk to Hugo:
- Type “Edit the system environment variables” into the start menu - should pop up quick.
- Click the old school
Environment Variablesbutton near the bottom of the dialog box. - Click on
PathunderSystem variables, then clickEdit... - Click
New, then type the full path to the directory you extracted Hugo into. You can cheat by clicking on the path in explorer and copy pasting it. Should look something likeC:\Users\johnt\OneDrive\Documents\WebDev\Hugo
- Scroll down and click on your os (prob
- Download and install Git. This allows VScode to connect to GitHub.
- Open up VSCode. It will probably bombard you with co-pilot garbage.
OPTIONAL: If you want spell check in VSCode click on the Extensions icon (bottom on the left menu) and type “Code Spell Checker” and install. Hotkey to fix is a bit weird
ctrl+.
Cloning the Repo
Almost done! Now all you need to do is clone the repo from GitHub. VScode makes this pretty simple:
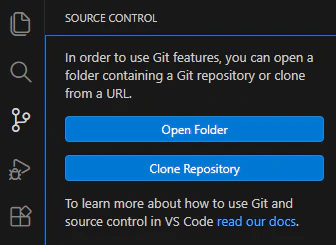
Clone Repository
On the top bar it will ask you to put in a GitHub URL. Enter the following then hit enter:
https://github.com/whitelotusinteractive/wli-docs
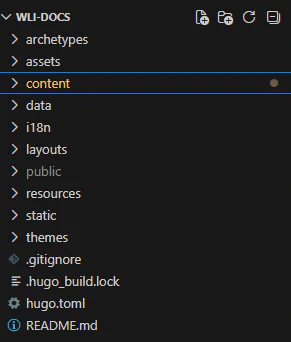
First it will ask you where you want to save the repo. It will automatically place a folder named “wli-docs” wherever you choose.
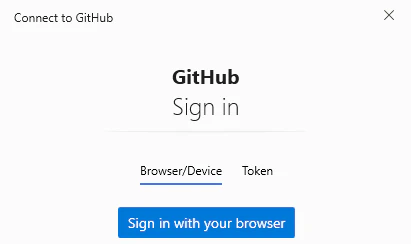
Sign in with your browser - if you were already signed into GitHub it will pop a success page in your browser.

Yes, I trust the authors.
Hugo
Hugo is used to “render” the website, and has lots of nifty features. Fortunately, you shouldn’t need to worry about any of that since I already wrote the bulk of the code - however, you do want Hugo installed so you can preview your work.

You’ll need to open a terminal from within VSCode - from the top menu bar, select Terminal > New Terminal.
Now, in the terminal the opened up at the bottom of the window, type hugo serve. Assuming your environment variables were setup correctly, it will run hugo and locally host the website on your computer. Near the bottom of the terminal output it should say something like Web Server is available at //localhost:1313/ (bind address 127.0.0.1)
If it complains about Hugo not existing, try restarting VSCode, then restarting comp, assuming you did indeed follow the hugo installation correctly.
OK, now all you need to do is copy past that //localhost:1313/ into your web browser, and you should see the homepage of the docs site! This is a local copy, and you can do whatever to the pages in VScode and it will update every time you save the file.
Submitting back to GitHub
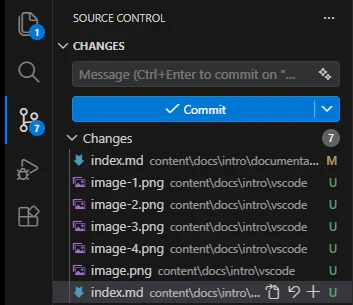
Commit.
The first time it may get mad at you if you never setup a git username and email. To fix this, in the terminal type:
git config --global user.name "Your Username"then:git config --global user.email youremail@example.com
![]()
You’ll need to push your changes after committing. Click the lil up arrow to send everything off to be built!
Occasionally you’ll need to sync up with the server. VSCode more or less automatically warns you about this, and should prompt you in the side panel. Syncing will update your local copy of the site to whatever is current.
Just like editing in GitHub itself, this site automatically deploys - IE any changes you submit trigger a build that will go live usually in around 40 seconds.