Documentation is fun
This site is made with Hugo, a static website generator thingy. While this grants some very tangible benefits (cheap, easy to render) updating it is a bit more technical than something like a wiki. Fortunately there are some nice tools to assist with the process.
Don’t be afraid to write in here! It is totally version controlled and can be edited, tweaked, and rolled back very easily.
Please note that this documentation site is public. Do NOT post anything sensitive IE logins n whatnot.
Github
Firstly, you’ll need a GitHub account - I know, annoying, but it is more or less the easiest way for multiple users to edit the site with authentication. Once you have an account, contact me (John!) to get access to the WLI repo. You’ll receive an email inviting you to become a “collaborator”.
Making an edit
Once you have an account (and have been added as a collaborator!) you can click on the “Edit this page” link at the top of every documentation page.
- This sends you to a GitHub editor where you can write.
- You can click the “Preview” button to check out your work - keep in mind it won’t look exactly like it does on the actual website as we are using different formatting.
Once you are done with your edits, click the green “Commit changes…” button to submit your work.
After submitting your changes, it takes about 40 seconds for the actual live site to update. Be patient!
Markdown
Documentation pages are written in “Markdown” - a super simple markup language a ton of programs use. That’s right, text only, no wysiwyg here! Honestly once you get used to it it ain’t so bad.
Here is a handy cheat sheet, but I’ll post a few of the most useful tricks here:
| Syntax | Description |
|---|---|
| Header | # H1 ## H2 ### H3 |
| Bold | **bold text** |
| Italics | *italics text* |
Unordered list:

- First item
- Second item
- Third item
--- makes a liney, just like <hr> in html (don’t use HTML in the docs lol)
You can make callouts too. > **Cool** *call* out looks like:
Cool call out
✨Emoji are supported!✨
You can link to other pages with [Link Text](URL).
- External pages should be verbose:
[Cheat sheet](https://www.markdownguide.org/cheat-sheet/) - Linking to other docs pages should be relative:
[*Advanced docs page*](/docs/intro/vscode)
Images
Images must live in the folder the page lives in. This looks something like:
docs/
├── intro/
│   └── documentation/
│      ├── index.md
│      └── MyCoolImage.png
Uploading an image on GitHub is a lil annoying, unfortunately.
On the left side of the GitHub page, click on the folder you want to put the image
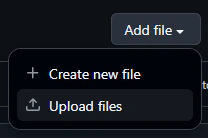
You then can drag in your image to the uploader, then commit the “changes” to the repository. Your image will now exist on the repo and is ready to be linked to in the page.
Images can then be entered into the page with . I’ve defaulted them to render centered with italic caption text below. Captions are optional - alt text is technically non-optional but I’m not gonna worry about screen readers too much.
Don’t worry about optimizing your images - Hugo automatically turns em into webp. They look a lil crunchy by default… I may crank the quality later.
GitHub technically supports pasting images directly into the markdown file, but it uploads the image to it’s own servers and thus can only be seen on their website, not the published one. Bummer. The advanced way of editing these docs via VSCode allows for fast copy pasting directly into the .md, which is what I am using to write this.
Creating a New page
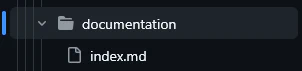
Making a new page is largely the same. Click “Create child page” up at the top right of any page - that will send you to a new GitHub edit page. Pay attention the the file path bar near the top of the page:
![]()
The “Create child page” link automatically sets the path to /parentpage/newpage/index.md - you should edit this path to line up with where you want the file. For example, if I wanted to place the new page from the image above into “level-design”, make it look like this:
![]()
The actual file MUST be named
index.md, nothing else! Please rename the folder it lives in instead. Also note that the page’s title does NOT come from the file or folder name but instead a field from within the file’s “Front Matter” The page comes with a lil template that should help you get started.
Front Matter
All pages come with a lil header that includes some meta data about the page. This is called “Front Matter” for some reason.
---
title: "Long Page Title"
description: Page description for heading and indexes.
weight: 0
---
Title is used both for the heading on the page as well as for the side menu. Description is a lil subtitle that lives under the title on the page.
“weight” is a number that is used to sort the pages in the sidebar. The lower the number, the higher it will show up on the list.
This stuff renders like a stupid table in GitHub - don’t worry! It formats nicely on the real page.
Sidebar / menu sorting
Pages, if placed in the right spot, automatically make a sidebar menu item. They respect the directory structure, so if your new page’s folder is placed within a different folder, it will show up in that drop down.
docs/
├── intro/
│   ├── _index.md
│   └── documentation/
│      ├── index.md
│      └── MyCoolImage.png
This will result in the documentation page living under the “intro” section. Once again, your new page always needs to live in it’s own folder and be called index.md.
Notice the _index.md file under intro, with an underscore. This is required for sections - works just like a page but all you need to fill out is the “title” field in the front matter. This is how the menu knows what text to use for the dropdown.
In the future I could make section pages actually hold content but I thought it was cleaner as is.
The “weight” front matter works for sections too - it’s how the “Start Here” section floats to the top of the menu.
There is support for nested folders, but visually the sidebar can only support maybe two nests, so don’t go overboard!
Edits!
Try it all out by posting your edit down below!
peachy made an edit here!